Updated: Jan 2, 2021 - Added tip 5 & 6. Added an index.
Update: Jan 7, 2021 - Added tip 7.
Although I've shared plenty of downloadable content before on the Internet, I've never had a proper "store". In fact, my only other experience selling a product has been a Udemy course.
When I started creating icons and covers for Notion, I knew I wanted to offer them as digital downloads. I'd heard other creators talk about Gumroad, so I decided to give it a try. There's been a lot of trial and error so far, as I've figured what works and what doesn't!
In this post, I'll share what I've learned so far when it comes to selling on Gumroad. I intend to keep this post updated with new tips and suggestions, so please be sure to bookmark it if you're planning to set up your own Gumroad store!
Sections:
- Intro to Gumroad
- Create awesome product images
- Opt into Discover mode for more traffic
- Build your list with free products
- Nudge for tips
- Add a link in your bio
- Use a custom purchase button
- Link to your other products in your product descriptions
First, what is Gumroad?
Selling stuff online has been notoriously difficult since the beginning of the Internet. Enter, Gumroad.
Gumroad make it dead simple to create a digital store to offer your products. This means that artists, freelancers and indie hackers (like myself) can get on with building and creating rather than futzing with product pages and payment processing.
No, this is not sponsored, I'm just a fan.
Anyway, let's get into what you're here for, which are the 4 things I've learned since starting to sell on Gumroad in October 2020:
1. Create awesome product images
You've spent weeks/months on a product and it's finally ready to go. It can be tempting to throw up any old product cover photo and call it a day.
Don't do this.
Cover photos are the first thing that visitors see when they come to your store. According to Gumroad, products with covers convert at more than 2 times the rate of products without them. 😮
When I first started selling on Gumroad, I tried to use existing images for my product covers (to save time). The images weren't the right size, the text was cut off and the aesthetic was inconsistent.
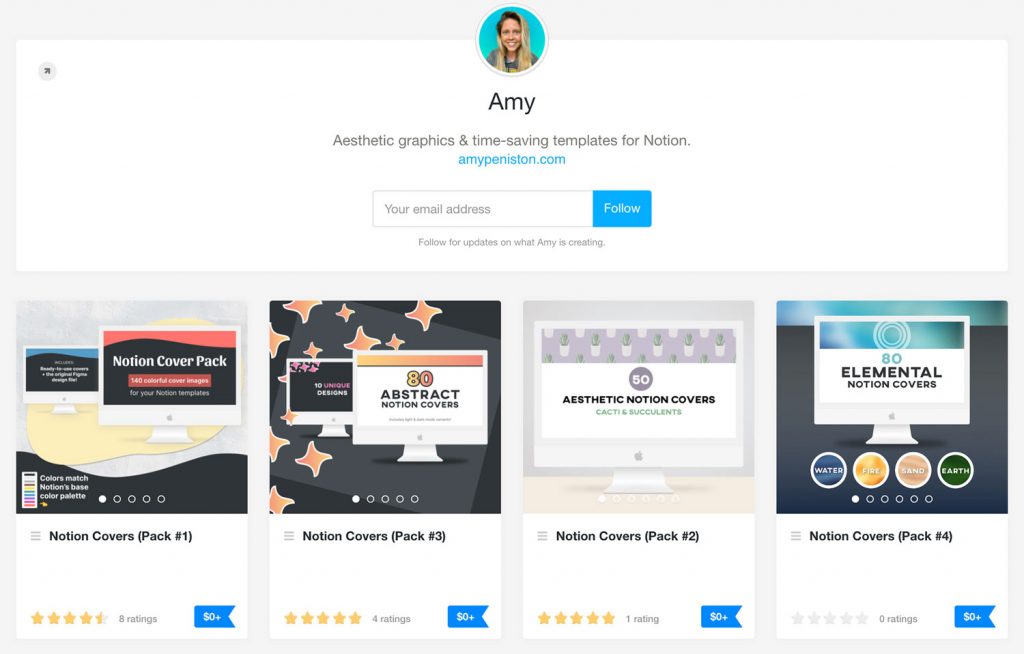
I recently went back and fixed all of my product covers to build a more cohesive look and feel to my store. Here are my recommendations for great product photos:
- Use minimal text (i.e. just the product title).
- Stick to a similar color palette and font selection for all of your product covers (if appropriate). This helps build a cohesive-looking storefront.
- Keep content in the center of the image unless you are using the correct aspect ratio. I suggest 1260x1160px.
Lastly, people like to get more. And one way to make them feel like they're getting more is to upload multiple cover photos. Visitors will be able to scroll through photos using the arrow keys. It adds to the WOW factor (speaking from experience here).
2. Opt into Discover mode to get more traffic
Gumroad Discover is an opt-in feature that puts your products in front of more prospective customers. Don't be like me and *think* you've opted in only to realize a month later that you haven't followed all of the steps to qualify.
For your product to actually be recommended in Gumroad search, you must:
- Turn on Discover in your settings
- Agree to "Display your product's 1-5 star rating to prospective customers" in the product's Share menu
- Verify your account
- Make a sale
- Receive 1 rating
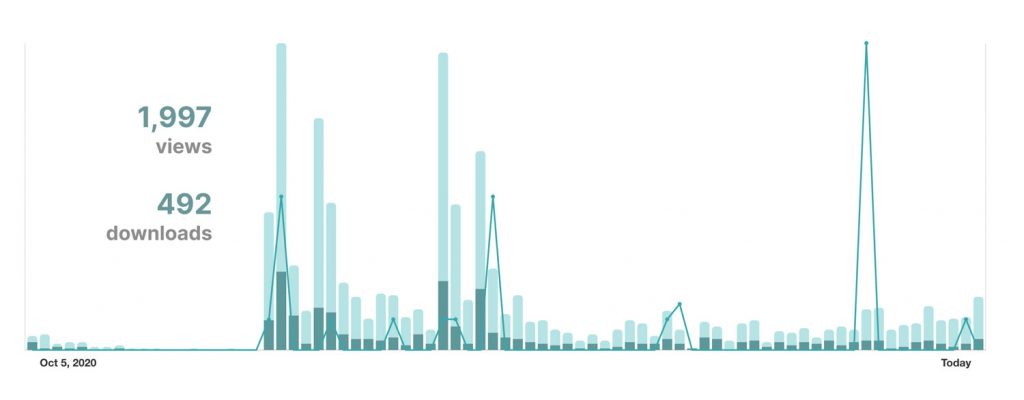
It can be tricky to get your first sale and your first rating, but it's worth the effort. So far, Gumroad Discover has netted me 116 views and 24 downloads, for a conversion of 20.7%. Not bad.
Two things to remember to do if you're opting in to Discover:
- Set a product category for your account. This setting aligns your content with one of the 18 different categories on Gumroad Discover.
- Add tags to your products. The tags section is at the very bottom of the Share page (and it's easy to overlook). Before setting your tags, browse through your product category on Discover and check out the Popular tags section. This might give you some ideas of what tags to include on your own products. 😉
Last thing – opting into Discover comes with an additional fee (boo, I know). Depending on the type of your account, products purchased via Discover will be subject to:
- 13.5% + $0.30 per sale for premium accounts
- 18.5% + $0.30 per sale for free accounts
Just something to be aware of if you decide to let Gumroad promote your products.
3. Build your list with "pay what you want" (aka free) products.
All of my products (except for one) are currently "pay what you want". This means that, on a product page, my customers see a form that looks like this:
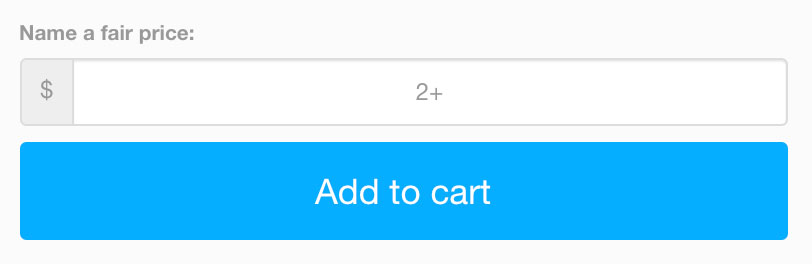
Customers can choose to name a fair price by typing a number into the input field. Yes, that number can be 0. Which effectively means that the customer gets the product for free.
If you're just getting started selling online, offering free products can be an effective way to grow your email list, build goodwill and entice customers to purchase other (paid) products. Here's how it works:
- Collect email addresses. In order to download a product (even a free one), Gumroad requires customers to enter their email address. You can view and manage your growing email list from within your Gumroad dashboard.
- Re-target old customers with new products. Gumroad also allows you to send emails from within your dashboard. My favorite feature is the ability to send emails to specific customer segments. For example, you can send out a promotional email only to customers who have not yet purchased a certain product.
- Build goodwill. People love free stuff, especially when it provides value. Products that you give away act as lead magnets, setting the stage for future paid products.
For reference, my product offering has, so far, netted me 400+ email addresses!
4. People are generous! Try nudging for tips.
As mentioned above, I'm using Gumroad's "pay what you want" feature to enable flexible pricing.
What I've recently started doing is adding a "suggested price" to each of my products. This pre-fills the input field with a number (in the above example, 2+) to nudge the customer towards giving a small amount of money in exchange for the download.
Believe it or not, but this actually works. People freely part with a few dollars, without being forced! Maybe I'm too much of a cynic, but this one really astounded me.
Another way to nudge users into giving a small donation is to include a "tips welcome" message in your product description or the "You'll Get" section. For example:
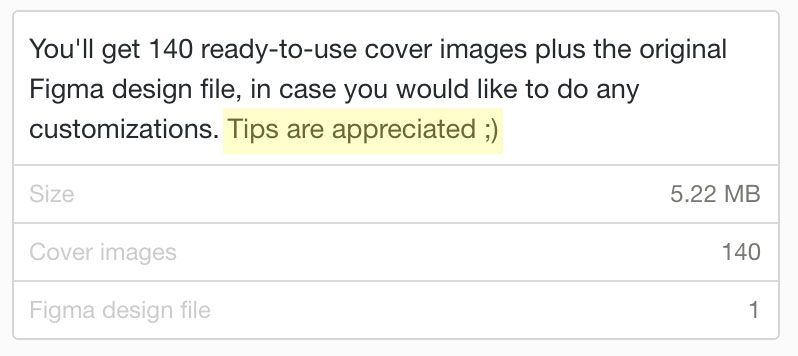
Just be aware that your "tips welcome" message should be close to the"add to cart" button, so that it catches the user's eye as they about to make a decision.
5. Add a link to your bio.
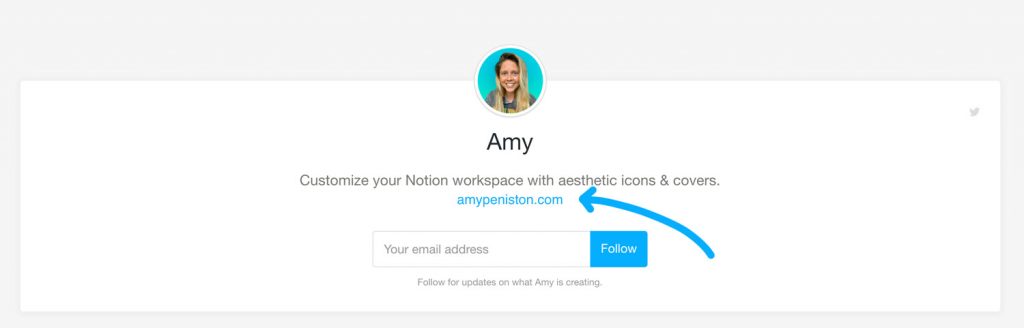
Similar to Instagram and Twitter, you can create a bio that appears at the top of your Gumroad store. What I didn't realize until recently is that you can include hyperlinks within your bio.
Having a link in your bio gives visitors something else to click after they have browsed your products. You could use it to promote your blog or invite people to follow you on social media. Here's my bio as an example:
Annoyingly, Gumroad doesn't give you a text formatting menu within the bio section. So, we have to use a workaround in order to add a link:
- Open up your favorite document editor and write a sentence or two about what you're selling.
- Add your desired link, making sure to style the link as you want it to appear in Gumroad.
- Copy this content and paste it into the bio section on your Gumroad profile page. Don't forget to click Save Changes to publish your update.
You should now have a clickable link in your bio!
6. Use a custom purchase button on your website.
Gumroad allows you to include a button on your website that opens a product page as a modal dialog (so your visitors aren't redirected). This is great, but you're not able to customize the look of the default button.
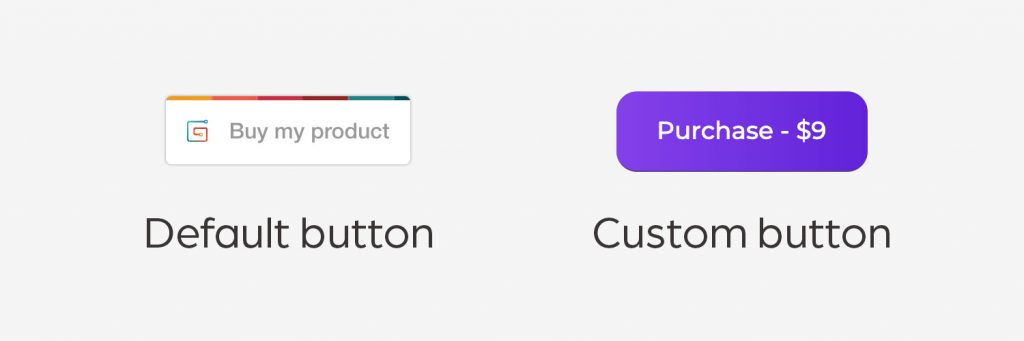
What I discovered is that you can trigger the modal using a custom button on your website. This allows you to create a more seamless aesthetic and purchasing experience for the user.
Note: to do this, you will need to be able to edit your website's code.
To hook up your custom button:
- First, create the button on your website. Style it how you like.
- Next, find the product on Gumroad that you would like to display when the user clicks the button. Go to the Share page for that product and find the Overlay section.
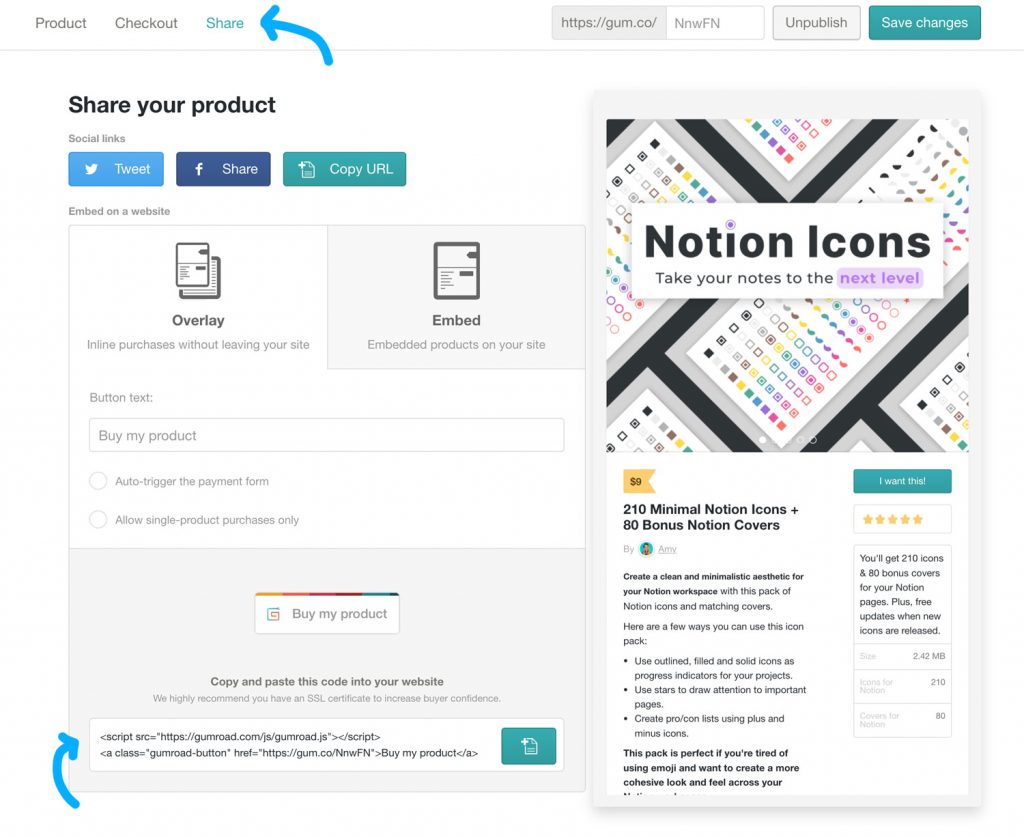
- Paste this line of code into the <head> of your website.
- Now, from the second line of code, copy the part between the double quotes after href=. In other words, in the example above, it would be https://gum.co/NnwFN.
- Paste this URL into the href of the link for your button. For example: <a href="https://gum.co/NnwFN"><button>Purchase</button></a>
- Test your button!
7. Link to your other products in your product descriptions
One thing that I've noticed is that people don't normally download a single one of my free products. Instead, they download *all* of my free products.
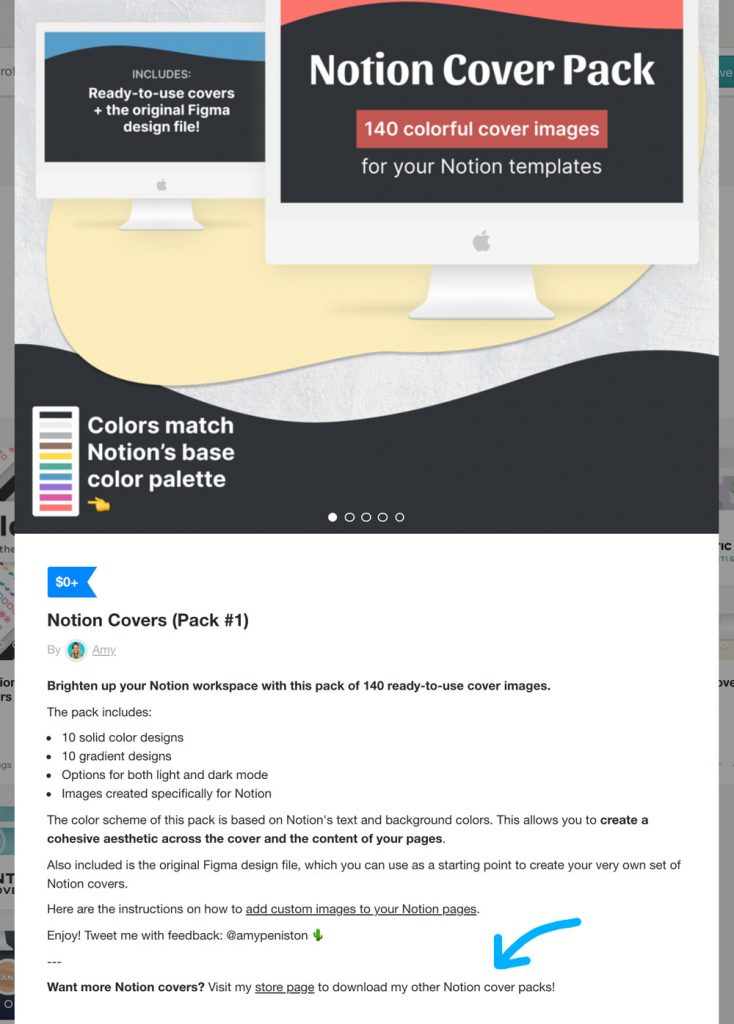
I make this easy for them by highlighting the fact that I have other related products within my product descriptions.
Below is an example. At the bottom of the description, I use bold text to draw the user's eye: "Want more Notion covers?" Then I link back to my store page to make it easy to download my other cover packs.
Try it out if you have multiple related products!
Wrapping it up
I have not even scratched the surface of what you can do with Gumroad. There's affiliate links, pre-order pricing, fixed quantity products, custom domains and much, much more...
So, as I continue to figure out what works, I will keep this post updated. 🙌
In the meantime, I hope you've found this content helpful and you're inspired to set up your own Gumroad store.